There may have been years worth of work that has gone into bagging your first deer, and not always are you fortunate to have someone with you that first time that can teach you how to field-dress a deer. The following directions are the basics of field dressing.
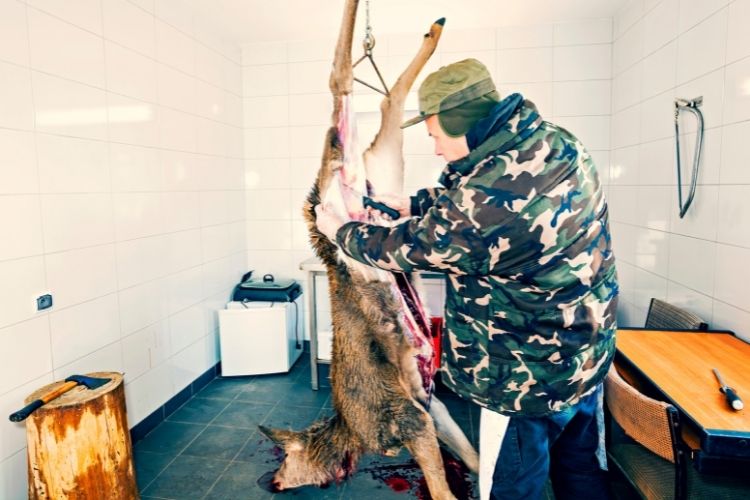
Please keep in mind that everyone has his or her own favorite way to do this. Many prefer to completely dress the animal in the woods, and others choose to “field” dress and finish the job when they get back home. The option is really yours and where you prefer to be. Personally, I like to do as much as I can in the woods.
Having someone with you to assist makes the job easier, but I will assume that you are alone with your prize.
1. Locate a spot in the woods that can be beneficial to you. Most prefer to dress a deer on a bit of a downhill grade, so if that is not an option, look for a slight rise in the nearby terrain and drag the deer there. You can use the grade off one side of the rise.
2. The single most important thing that you want to focus on is not cutting into the “ponch”. The ponch is the stomach and intestines. Rupturing those can be messy, and the odor sometimes is overpowering, so work slowly and methodically.
3. If you can position the deer on its back, that would be helpful. Again, if you are alone, use your dragging rope to assist in tying the deer into position. Don’t be bashful. I find that if I straddle the deer’s head and hold its front legs apart with my knees, it affords me room and keeps both hands free to cut. If you have a rope, use it to hold the deer’s two front legs apart.
4. You will find that the animal’s dead weight can be difficult to handle, so be patient. The lower part of the deer will be rolled to one side or the other. Starting at the chest area and working toward the butt of the deer is easiest, and at a point, you need to move from your straddle position at the head to the rear.
5. Start at the chest. Find the point where the rib cage joins together and, with one hand, grab the hair and skin and lift it up and away from the stomach cavity. With the other hand, use your knife, and you better hope it is sharp, and begin cutting the hide being careful not to go too deep. As you cut, you will find that there is a layer of the hide and directly under that is a thin muscle area that protects the stomach and intestines. Go ahead and carefully cut that as well.
6. Move from the point of the rib cage toward the rear. Approximately 2/3 to ¾ of the way down the torso, you will need to switch ends and move down and hold the hind legs apart as you finish opening the deer. The farther you get away from the rib cage, the easier it is to hold the hide and inner muscle layer up and away from the ponch.
7. If the deer you have shot is a buck, you will soon come to its testicles. Choose one side or the other to cut around, but eventually, you will remove those from the deer. Continue cutting and slice the hide all the way to the anus.
8. This is where most hunters have differing opinions as to what to do next. Most are correct – just different approaches. Hopefully, you have succeeded in keeping the stomach in one piece. There are two more things that you need to keep tabs on and work hard not to rupture if possible as some contamination could occur. One is the bladder, and the other is the intestines. Many times both will have matter contained in them. Assume that they do.
9. Roll the deer onto one side with the opening you have just made in the body cavity facing downhill. This will require loosening or retying your ropes if you are using them. Let the guts roll out onto the ground along with the blood that has collected in the body cavity. You will now need to get down and get dirty.
Reach up into the chest cavity until you find the esophagus. That is the “pipe-like” tube coming from the throat to the deer’s stomach. Once you have found it, reach in with the other hand and a knife and cut it off. This will release the majority of the guts, and the intestines will still be connected to the rectum.
10. While holding the hind legs of the deer apart, take your knife and finish removing the testicles. Once that is done, continue cutting with your knife into the meaty part between the hind legs until you strike the bone.
11. Move to the very rear end of the deer and locate the anus. Like a fine surgeon, carefully cut around the anus. If you follow the anus through the cavity located between the deer’s hind legs, you will discover that the intestines connect to the anus. If you are careful, you can continue to cut around the anus, moving deeper and deeper at the same time, lightly tugging at the intestines still connected to the guts you have rolled onto the ground.
Once successful, you will be able to remove the anus in one piece still connected to the intestines. Some hunters will cut the intestines to finish removing the guts before they remove the rectum and anus. If you choose this option, be as careful as you can not to get deer feces inside the deer cavity. If you have shot a doe, remove the female organs with the rectum and anus.
12. Next, the bladder should be removed. When you removed the testicles of the buck or female organs of a doe, you cut the tube that carries the urine from the bladder. At the end of the bladder toward the head of the deer, is another tube that enters the bladder. Cut it off, being as careful as you can not to rupture or spill urine into the cavity. With both tubes cut, try to remove the bladder by holding both tubes to prevent urine from escaping.
13. All that is left is the diaphragm and the lungs that you will find deep up inside the chest cavity. You will need to reach up inside and cut through the diaphragm to gain access to the lungs. The furthest reach you will have is to locate the windpipe and cut it off. Once that is done, the lungs and diaphragm come out quite easily.
That is pretty much it. Again some hunters prefer to only remove the ponch and finish the job later. That’s up to you. If you have access to water, it is helpful to be able to rinse off yourself, and some opt to rinse the inside of the deer cavity as well. Some will do it well when they get home.
A couple more helpful hints:
Carry some extra paper towel sheets with you, or I carry baby wipes. They can clean up a lot of things, and I often use them as toilet paper. Also, once the deer has been gutted, I like to roll the deer into a spread-eagle position and leave it while I clean up, etc., and let a lot of the blood in the cavity drain before it clots.